Take Your Integration Public

Gustav Henriksson - 4 April, 2025
Congratulations – your integration is ready to go public! This post explains what happens next and what we need from you to get your integration published and visible to our common customers.

What does going public mean?
Once your integration goes public, it will be listed on our website at https://bjornlunden.com/se/integrationer/.

Your integration will also be visible directly in our products, Lundify and BL Administration, where customers can find, activate and deactivate integrations themselves.

In return, we ask that you display the Bjorn Lunden logo on your own website. You will find logos and graphic material in our press kit: Download the Bjorn Lunden press kit.

We also encourage you to make a short post on social media announcing your integration – and don’t forget to tag Bjorn Lunden! That way we can share your post and together give your integration an even bigger reach.

How to get started
When you feel that your integration is ready for production, contact us at api.se@bjornlunden.com and include the following:

1. Logo for the integration
Preferably in EPS format, as we may sometimes need to print it in larger formats for visibility at events like business fairs. If EPS is not available, SVG is the next best option.

2. Permissions the integration requires
Which API requests do you need to make? Please list GET, POST, PUT, DELETE and PATCH for each endpoint used in the integration.

3. Information text describing how the integration works
This text will be published on our website and in Lundify and BL Administration, where customers browse available integrations. Feel free to check how other integrations have formatted their descriptions: https://bjornlunden.com/se/integrationer/

4. Contact details
For your support or sales team. Please provide a phone number and/or email.

Partner levels and benefits
As an integration partner you can qualify for different partner levels, each with its own benefits and criteria. Read more about what applies here: https://bjornlunden.com/se/integrationspartner/

We look forward to seeing your integration go live! If you have any questions along the way, don’t hesitate to reach out to api.se@bjornlunden.com.

Company Activation & Key Retrieval

Gustav Henriksson - 31 March, 2025

The sandbox company included with your integration is pre-connected. However, for real companies to use the integration, an explicit activation is required.


Company Activation Methods

There are multiple ways for a company to activate the integration:


  • From within BL: By clicking an activation button.
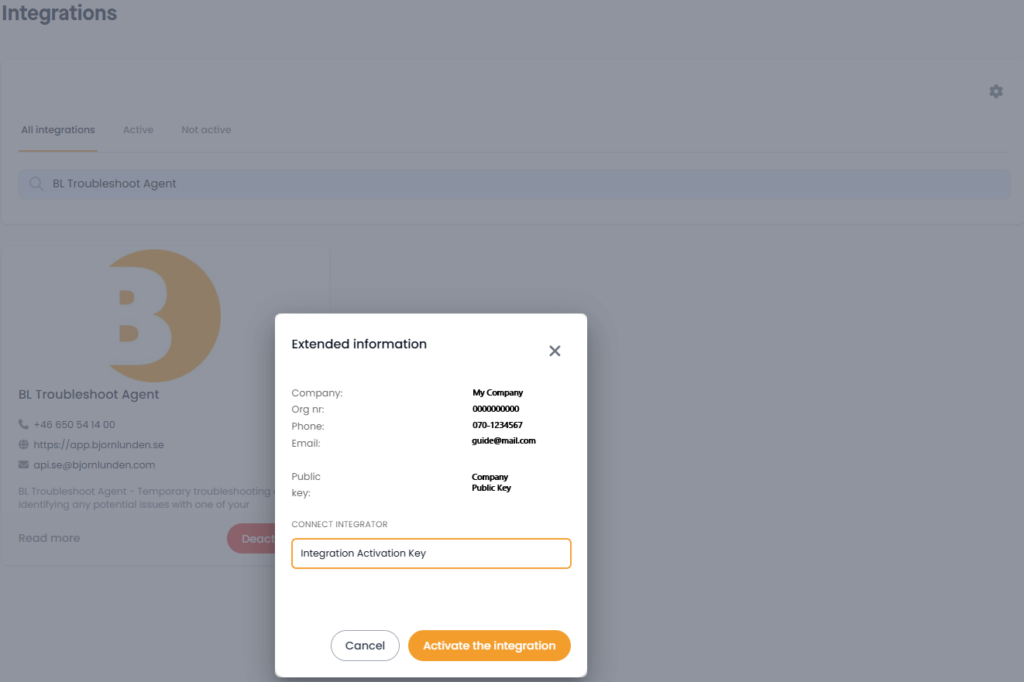
  • From within BL: Using an activation key provided by your integration.
  • From your integration: Redirecting the user to BL’s activation flow via an activation URL (Only supported by web users).

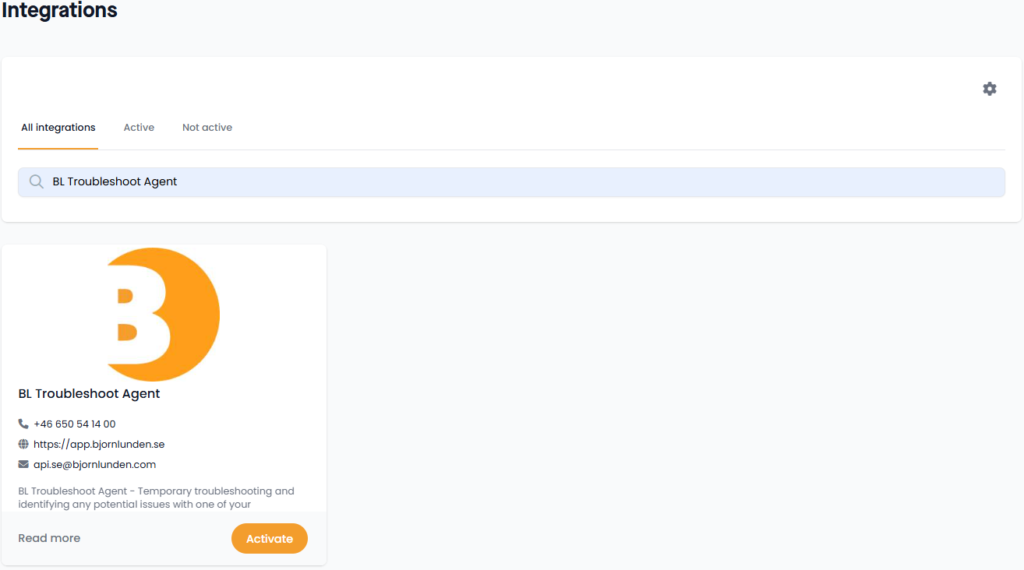
1. At integrations from within Lundify or through archives -> integrations from within BL Administration.

Find the public integration and activate by the activation button


2. At integrations from within Lundify or through archives -> integrations from within BL Administration.

At the top right corner at the gear icon a company can activate by a activation key created by BL and provided by the integration


3. With a redirect URL from within your platform through an activation flow in Lundify.

With a provided URL you can redirect users through an activation flow from within your platform.

lundify.com/activate-integration/{integrationActivationKey}/{encodedRedirectUrl}?extra={optional}.


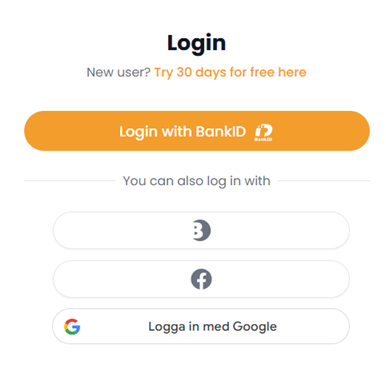
    3a. The redirect start by asking the user to login if not already.


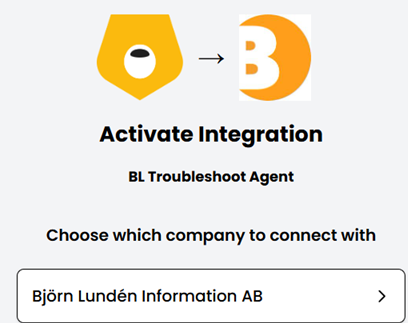
    3b. The user select which company to connect with.


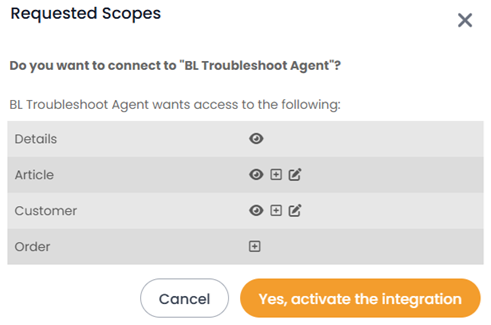
    3c. The user accept the requested scopes.


    Which will then redirect the user to:

     redirectUrl?publicKey={publicKey}&extra={optional}


How to Retrieve a Public Key of a Company

The public key is required to identify and authorize access to a company. You can support any or all of the following methods:


  • Manual: The company copies their public key from BL and pastes it into your platform or service.

  • Callback URL: When a company activates or deactivates the integration, BL makes a backend call to your registered callback URL:
    • yourRegisteredUrl/{publicKey}/ON/{orgNr}
    • yourRegisteredUrl/{publicKey}/OFF/{orgNr}

  • Redirect Flow: Guide the user through BL’s activation flow using:
    lundify.com/activate-integration/{integrationActivationKey}/{encodedRedirectUrl}?extra={optional}
    After activation, the user is redirected to:
    redirectUrl?publicKey={publicKey}&extra={optional}

  • Redirect from a settings button from within BL: After the activation been done you have the option to display a seccond button on the integration card saying setting. Opon clicking the button the user is redirected to the registered settings URL together with the company public key.

    Example: yourSettingUrl?publicKey={publicKey}


Depending on your needs, the methods can be combined to ensure who is activating or making changes.

You can manage your URLs by sending a request to api.se@bjornlunden.com or reach out with any questions you might have.


Helpful Tip

As mentioned in the API Quickguide, you can request a list of company keys from already established connections. This can be helpful when identifying existing links or verifying the status of a company.


Finally We hope you found this guide helpful, and that you will find our API intuitive and productive.
Also please don’t hesitate to reach out to us if you have any other thoughts.

Authentication & API Requests

Erik Söderlund - 19 May, 2022
First of all, thank you for your time and interest in Bjorn Lunden’s API! This tutorial will guide you through the steps needed to make your first successful API calls.

Step 1 – Onboard your integration
Visit https://developer.bjornlunden.se/get-started/ and follow the instructions to obtain your API credentials. We use the OAuth 2.0 Client Credentials flow to identify your integration, and GUIDs to identify specific companies or databases. Once onboarding is complete, you will also gain access to a sandbox company, representing your first connected client or customer.

Step 2 – Get an access token
Use the credentials to request an access token from our identity server. Each token is valid for 3600 seconds (1 hour), and multiple tokens can be used simultaneously. However, we recommend reusing valid tokens when possible to reduce unnecessary load on our servers.

Example:
curl -request POST \
  --url {authUrl}/oauth/v2/oauth-token \
  --header 'authorization: ' \
  --header 'content-type: application/x-www-form-urlencoded' \
  --data grant_type=client_credentials


A successful call will return a response similar to this:

{
  "token_type": "bearer",
  "access_token": "_0XBPWQQ_f2c49d50-6ce0-42a2-a3fe-2670fc72372a",
  "scope": "",
  "claims": "email",
  "expires_in": 3599
}


Step 3 – Get list of connected companies/clients
This call will give you the list of id’s to connected companies. Once you go live with your finished integration, this list will grow as more companies connect themselves through our Marketplace, but if this is the first time you call this endpoint, the list most likely will consist of only the one Sandbox company that we created and connected to you as part of the onboarding in Step 1. These GUID’s are global and static in our systems, and potentially suitable to persist in your system as an identifier for the same company on your end as well.

alt.1
curl
--location --request GET ‘{baseUrl}/meta/allKeys’ \
--header ‘Content-Type: application/json’ \
--header ‘Authorization: Bearer
The answer will be an JSON array of GUID’s each representing a connected company that you are allowed to access through the API.

alt.2
curl
--location --request GET ‘{baseUrl}/common/client’ \
--header ‘Content-Type: application/json’ \
--header ‘Authorization: Bearer
The answer will be a JSON body containing the name, GUID(s), email address and scopes for each connected company that you are allowed to access through the API.

For the Sandbox, you will have extensive rights to enable you to develop your integration to your liking. But when you are ready to go live, we will validate and agree on which endpoints and scopes you will use in production. The ever-growing list of possible calls can be found as Swagger here https://developer.bjornlunden.se/api-documentation

Step 4 – make a call to your Sandbox company
The only additional thing needed from step 3, to make a call regarding a specific company, is the HEADER “User-Key” with the GUID value found in step 3.

curl
--location --request GET '{baseUrl}/details' \
--header 'Content-Type: application/json' \
--header 'User-Key: ' \
--header 'Authorization: Bearer '

That will give you an extensive JSON object with the details of the company identified by “User-Key”. (More information about the response for this call can be found here: https://developer.bjornlunden.se/api-documentation/ under “details” – where you also can find complete Swagger specs)

Finally
We hope you found this quick guide helpful, and that you will find our API intuitive and productive.
Also please don’t hesitate to reach out to us at api.se@bjornlunden.com if you run into trouble or have any thoughts.